Bangers, Boxes and Babies – The Northern Flicker
Native Bird Care, Elise Wolf, Sisters, OR
People often ask us for advice on what to do about Northern Flickers drumming on their houses. Birds’ relationships with us and our homes result from their attempts to navigate a human-altered environment they have no control over. Solutions should be sought with a compassionate and friendly attitude.
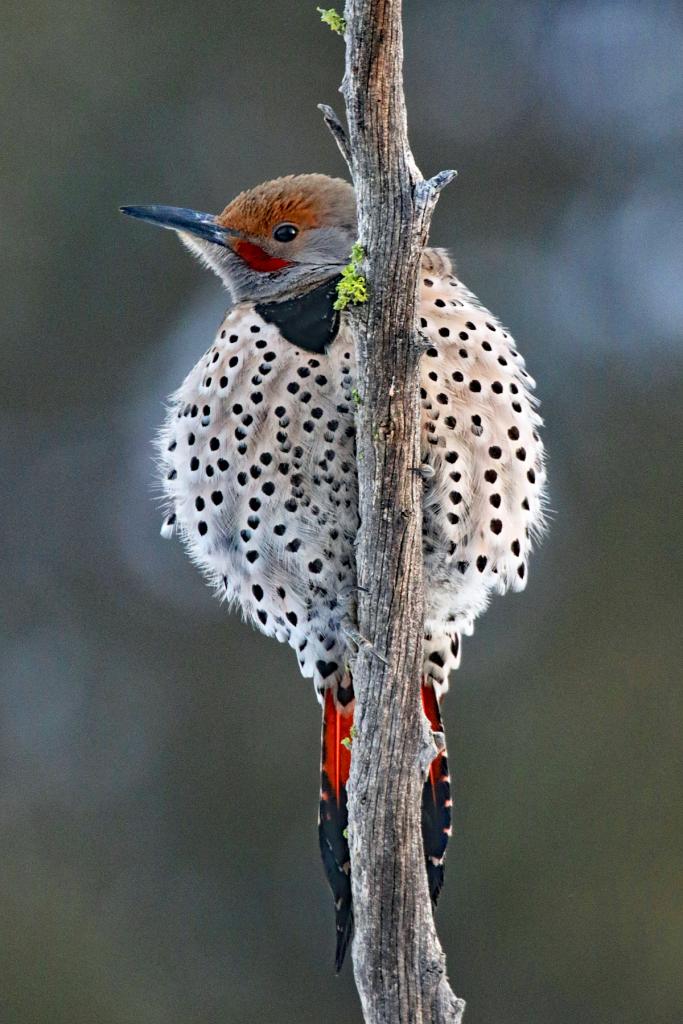
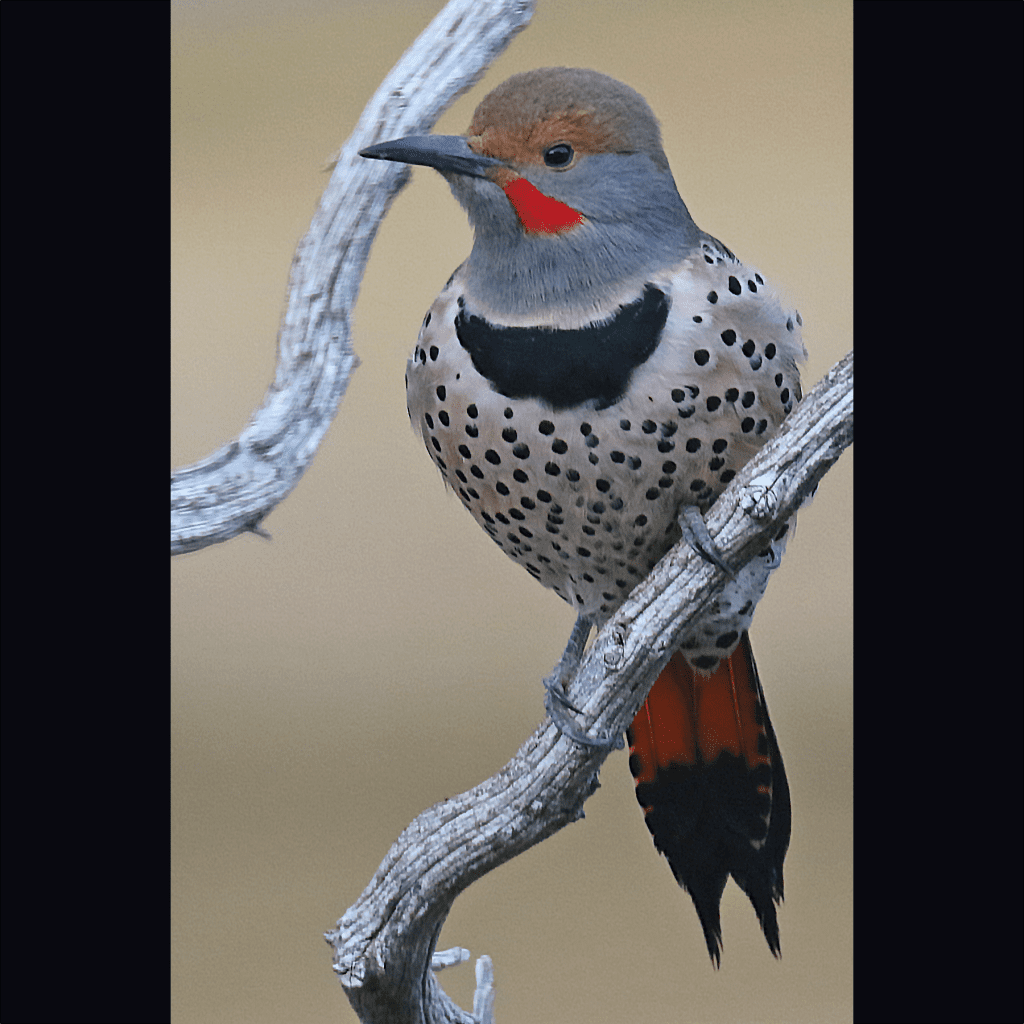
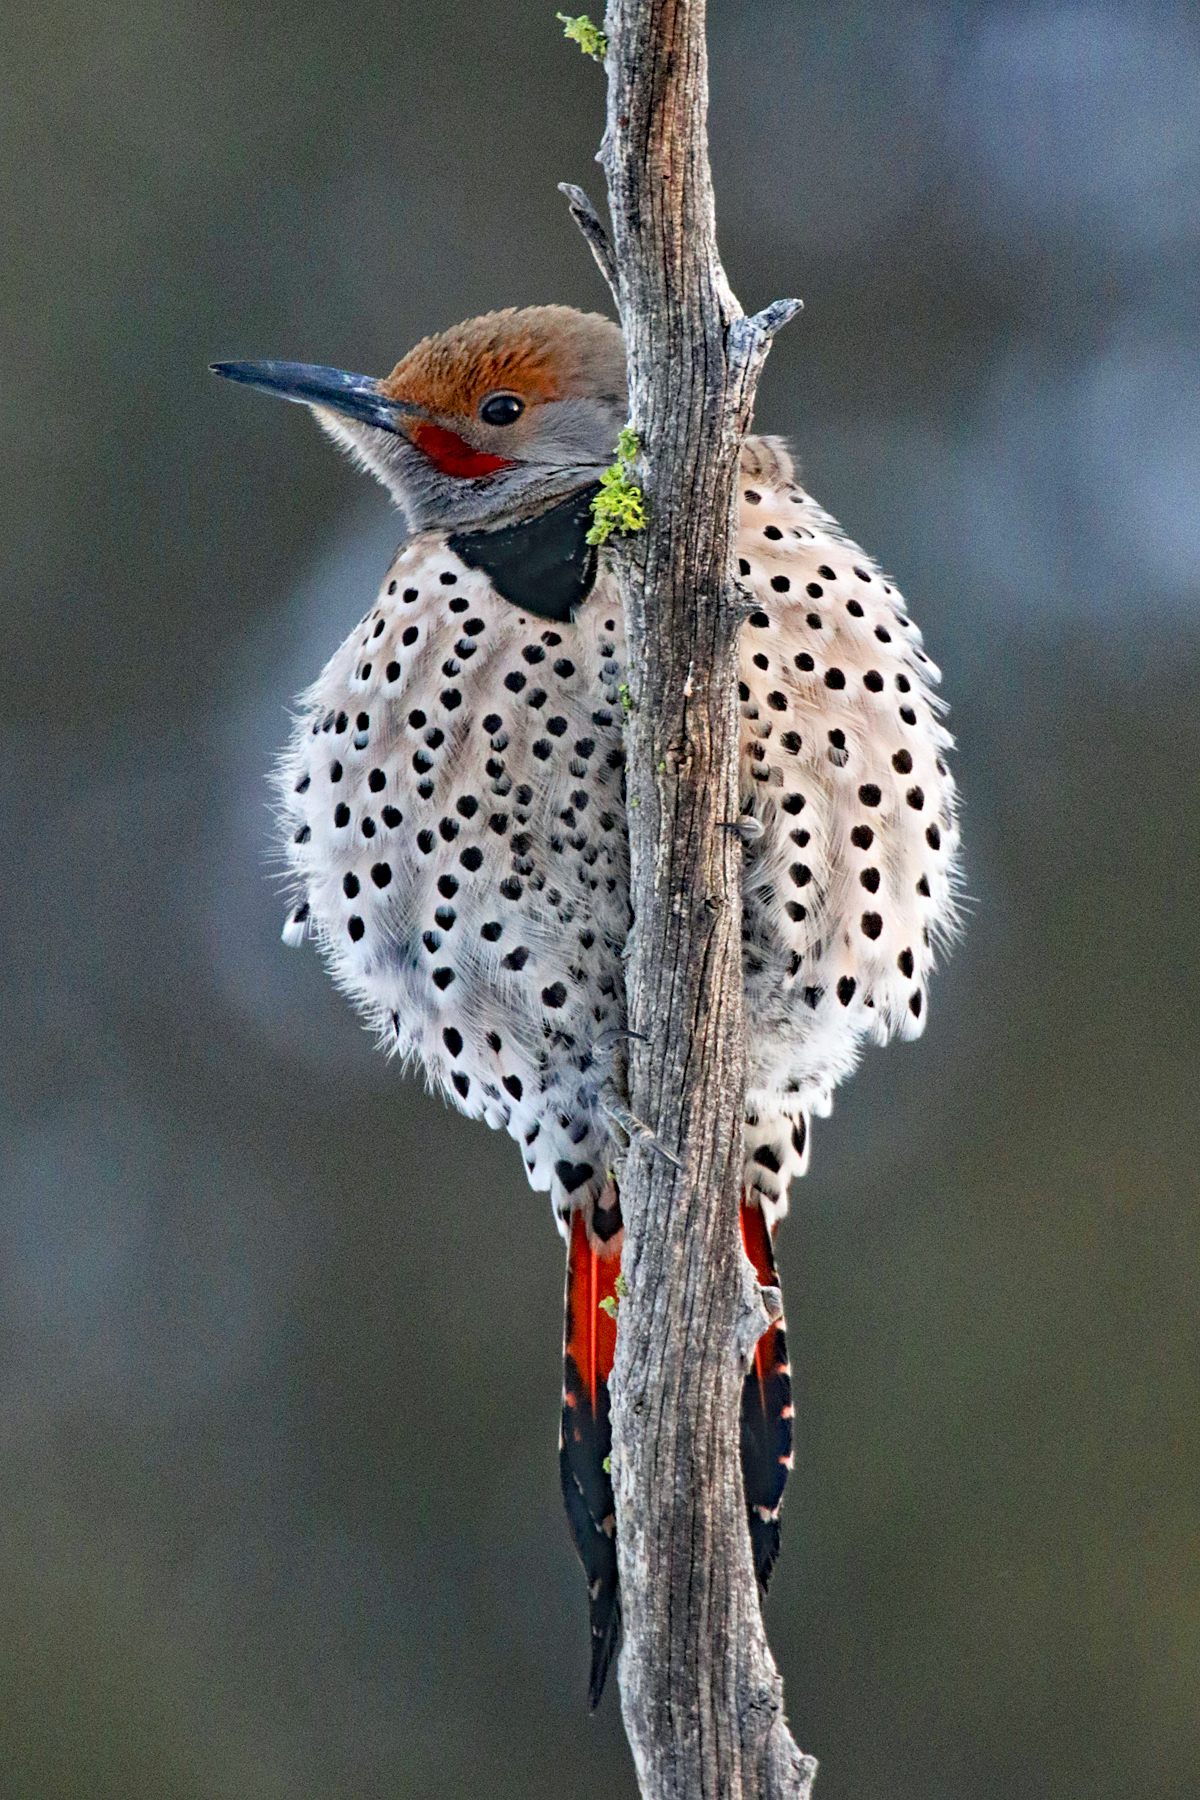
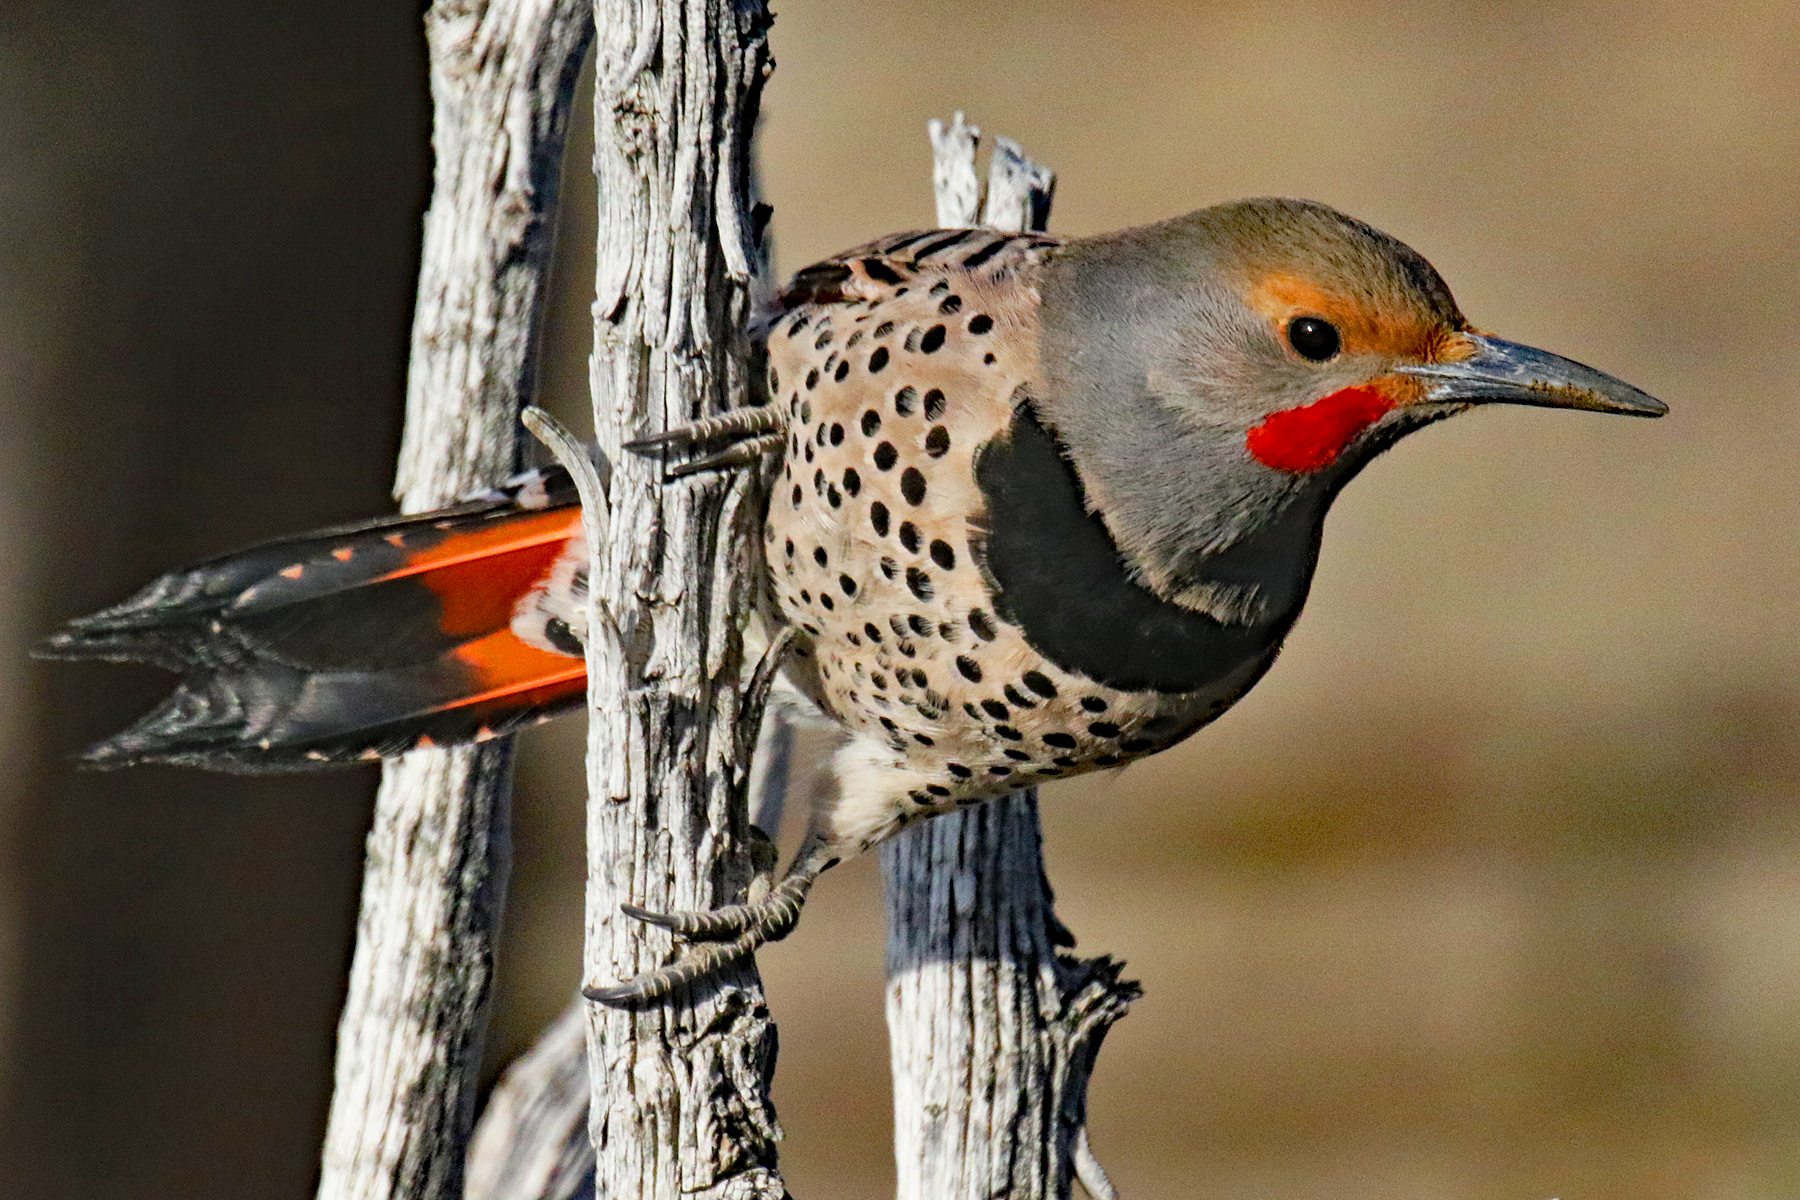
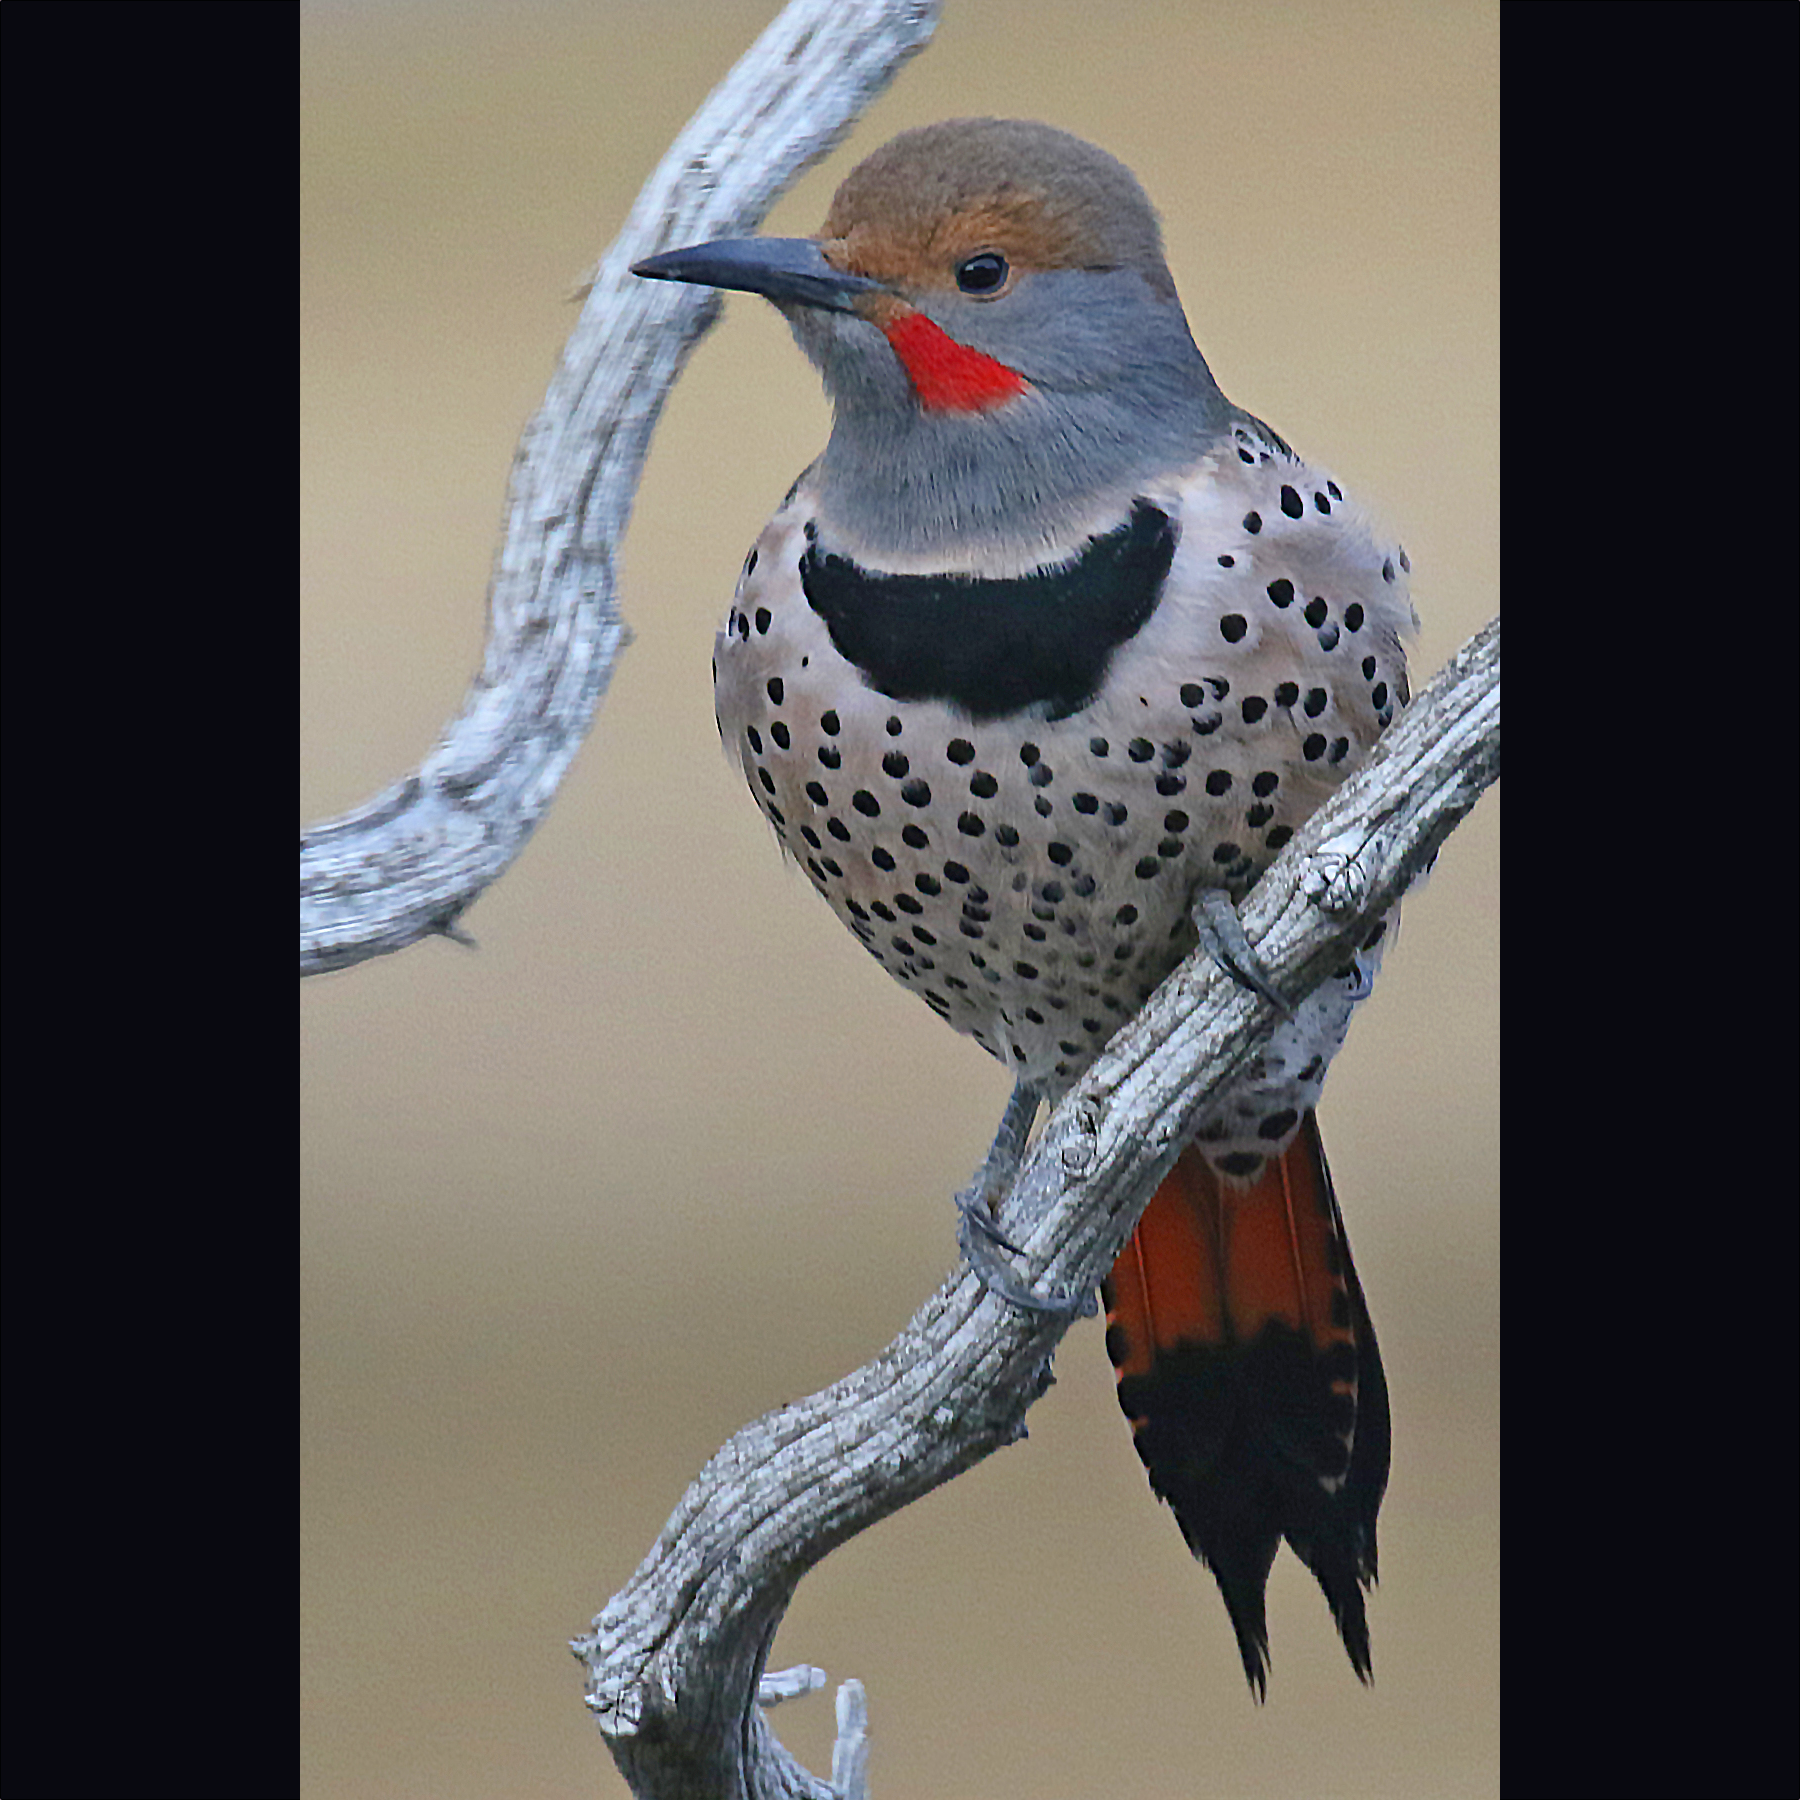
The Northern Flicker is a critically essential habitat species. They are one of our largest woodpecker species and can deliver hard and deep enough blows to create a cavity in nearly any tree. These colorful, energetic habitat creators provide needed cavities for many other tree-nesting species – owls, kestrels, ducks, small mammals, and songbirds, including chickadees, nuthatches, and swallows. They are a ‘keystone’ species, meaning other species who would otherwise be unable to create their own cavities rely on them. Cornell Lab of Ornithology says, “The loss or diminution of the Northern Flicker would likely have a large impact on most woodland ecosystems in North America.”
For the home-owner, a positive attribute of the flicker is that they are predominately ant eaters – often consuming entire breeding colonies of carpenter ants. They are mainly ground-foraging birds but will also eat insects found on or inside trees, like wood-boring beetles. If you have insects on your home, like from old siding or old stain/paint, these birds will help clean up the house. So, keeping the siding in good shape is important. In Central Oregon, these stout birds love the Juniper because this sought-after habitat tree will remain standing though its insides have begun to rot. Many cavity-nesting species – many of whom we see at our feeders – use Juniper for its incredible ability to have multiple cavities throughout the tree. So, if you like flickers, keep your Juniper and snags.
Flicker drumming is what most people struggle with come spring and is a sign of the male letting the world know about his nesting territory. The drumming is also a way to get a new mate or get his current mate in the mood, so to speak.
While the drumming might indicate the bird wants to make a nesting hole in the home, it is more often simply a non-vocal call that does little to harm the house. The louder, the better, so metal roofs and gutters are of prime interest to flicker males. If the drumming is intolerable or the birds are causing damage by trying to excavate a nest, we must find a solution.
Finally, due to habitat loss (natural and human-caused), cavity nesters compete vigorously for nest holes. Starlings are another key reason flickers lose out on cavities.
Solutions!
TIP #1
One of the easiest solutions is to ignore the birds.
If they are drumming on metal, like on gutters, it will likely not cause damage. At Native Bird Care, we have successfully ‘trained’ our flicker male to drum on the back gutters by ignoring and allowing that while shooing him off other parts of the house. If you relinquish the gutter, then they may leave other areas of the house alone. Flickers stop drumming once they have successfully established their territory, which does not take long (about two weeks at our center). They are only territorial regarding their nest sites, not food – so this is a short-lived period.
Tip #2
Stop feeding suet and hulled sunflower seeds.
When we invite wildlife to our yards by feeding them, we also invite all of their other natural behaviors. Chasing them off our homes while continuing to feed them pushes them into neighbors’ yards and onto others’ homes. There is simply not enough natural habitat in the urban landscape for their nesting. Keeping dead or dying trees (snags) and Juniper in our yards provides homes for these birds. However, we should all think more about the ‘carrying capacity’ of our yards and local area landscapes, which is how much food (insects) and territory there actually is for all the nesting species we may be inviting with nest boxes and bird feeders.
Tip #3
Dull the sound and prevent access.
There are are a few solutions for eliminating or reducing the sometimes-mind-numbing drumming.
A) Deaden the sound using products. If the drumming site is metal, duct tape or rubberized coatings work well. Do NOT use sticky tapes or other harmful solutions; these are illegal and cause unnecessary suffering for the bird by coating their feathers and harming their weatherproofing.
B) You can also place cardboard or wrap cloth around the gutter. You will need to treat all areas of the home that are most sought-after – they will be at or near the top of the house, usually metal.
C) You can also enclose the area, say a chimney, with chicken wire or box it in to discourage drumming.
Tip #4
Complete exclusion
Completely excluding flickers from homes is a challenging but doable process. Many products are available now that are easy to install and are cost-effective. Exclusion is about making the house unattractive for drumming or nesting.
A) Hang ‘bird repellant’ tapes, shiny wind spinners, twisting, reflective rods, outdoor hanging sculptures, and wind chimes. Mylar strips can be twisted, and the ends can be reinforced with duct tape for hanging. Ensure that any tape used is tough enough not to break and become a wildlife hazard. Never use string to hang products; use rope, bungees, or wire so that if it falls or the wind blows it off, it cannot get wrapped around animals’ feet or bodies. We also advise against balloons because of the wildlife injuries they cause.
B) A great Earth Day kid’s project is to do a craft day by using old CDs, aluminum pie pans, cutting shapes out of aluminum turkey pans, and recycling other shiny (but safe) objects. Fake black rubber spiders and the Birds Away Attack Spider® are also fun additions to exclusion hangings. String these up using a thin rope or wire. Many of these work wonders for windows as well! Special Tip! Swivel hooks can turn all sorts of things into spinning, moving exclusion devices. Use these with your CDs and pie pans!
C) Hang netting, sheets, or sheers off the eaves or entirely down one side of a house using cup hooks or out away from the house using plant hangers. Netting works best if it is hung taut; otherwise, it can become a risk to the bird. Tarp, canvas, or netting can be used up in the eaves and installed at an angle to prevent nesting holes. Netting is an affordable and easy solution for this purpose and for keeping birds from striking windows.
D) Be sure to block any eave holes (before nesting season). Wood or sheet metal can cover holes and prevent further damage.
Caution! Please never use these exclusion ideas AFTER the birds have already created a nest hole. Exclusion materials can cause the birds to abandon their nests and eggs or babies, which is illegal due to the harm they cause to the birds.
Tip #5
Flicker boxes
Flicker nest boxes are increasingly suggested as a near-total solution to flicker issues. However, bird nest boxes should only be put up when the situation is right for the birds. See below.
Simple rules to follow:
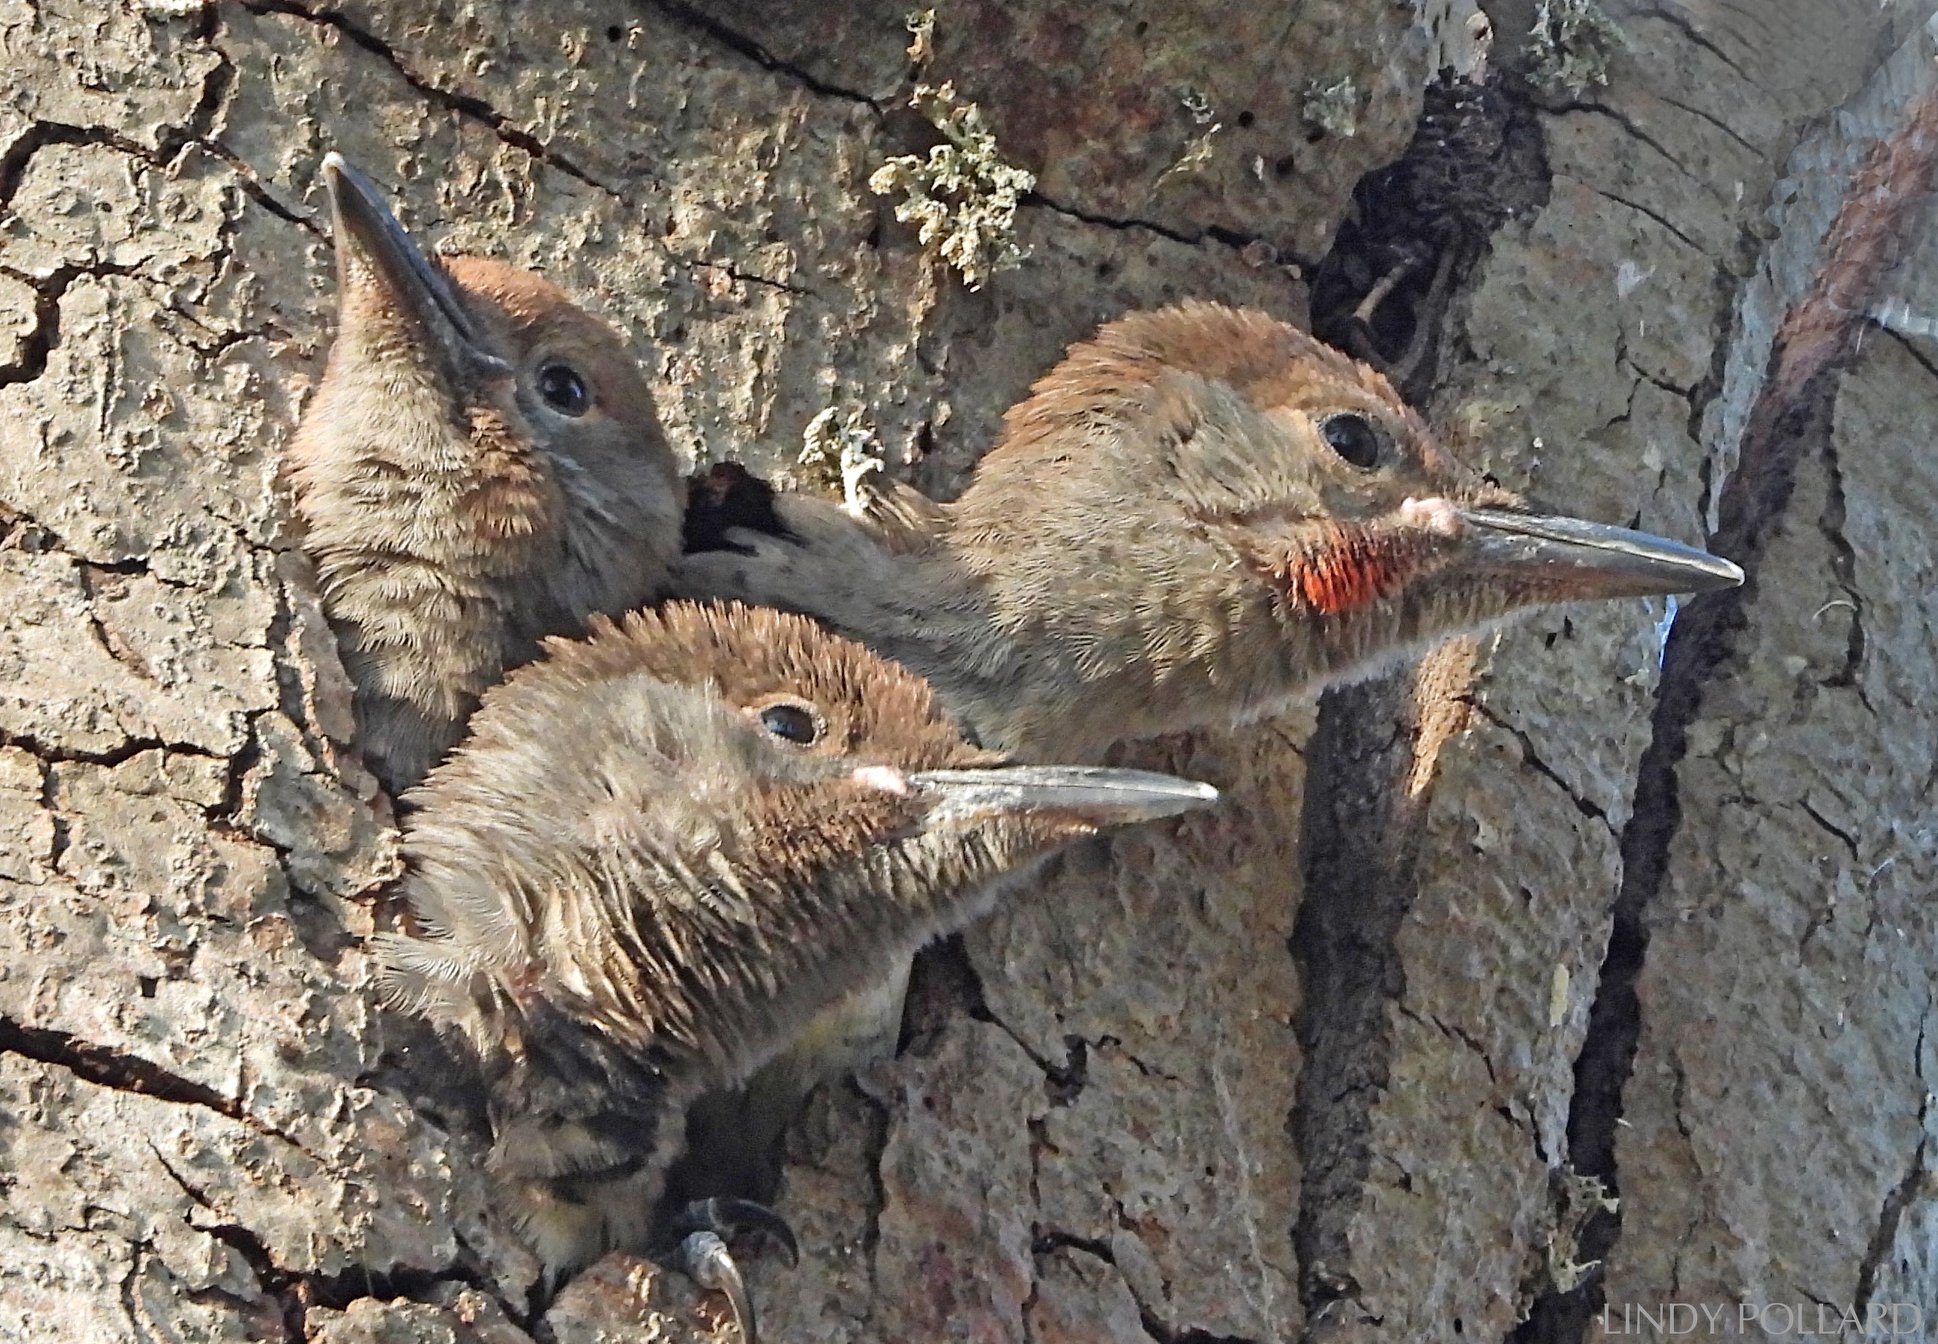
A) Flicker boxes should be no less than 23″ tall and 18″ from entrance hole to floor. The floor should be no less than 6″ x 7″. When purchasing or making a flicker box, look carefully at the dimensions! There are a lot of poorly designed nest boxes on the market. And, because a box was handmade, it does not mean it is a good box. This rule also applies to box plans (the NestWatch plans have a floor that is too small for Flickers). Flicker babies are large; too small of a floor space crams them together and can lead to undeveloped, starving babies and poor feathering.
B) Always put grooves up all four sides of the inside box walls. Flicker babies start to perch vertically on the cavity walls at about two weeks. There will not be enough room on the floor for the babies, even with a 6×7″ floor. Being gregarious, flicker babies need space, so make sure they have use of the entire inside of the box. If you make the box, this is easy, use a small saw to make 1/4″ depth grooves about 1/2″ apart horizontally up the walls, going all the way across. On the front, ensure the grooves go all the way across so babies can push each other aside to get to the hole for food. Vertically perching babies will be more equally fed and have far better plumage. A tail in good condition is paramount for woodpeckers.
C) Pack wood shavings (pet bedding) into the box enough to make it firm. Aspen bark is best as it is not dusty (bad for bird lungs), has fewer splinters, and lacks the sap other tree species have, which can get on baby skin and growing feathers. Flickers need to excavate to become physically able to produce young. They will not use empty boxes, and packing the box full excludes starlings.
D) Location: Proper siting and location is paramount. Base site decision on the home’s human activity in June and July – not April. Place ideally in a southeast corner for morning sun. Flickers will tolerate activity and humans until nestling stage (this is true of most of our of urban nesting birds). However, once the nestlings are able to flap a bit, they can easily get spooked from their nests/cavities and leave too early (which leads to death by predation or exposure).
Flickers are far more likely to use a box on the house; they look for the largest ‘tree’ and that is your house. Chose the most private, least stressful place – not above a door, or social gathering areas. Younger birds may not have the experience to know they are making a housing faux pau until it’s too late (one way I get baby birds). Placing the box on the house also works best if you have a small yard and the house is the best ‘tree.’ If you want to exclude a current flicker’s hole-building project on your own house, try putting up a nest box over that hole.
Another location option is on a metal conduit pole out in the yard at 8’-12’ high. This prevents predators being able to climb up and get into the box. Place 10’ from nearest tree, in the shade, facing South or Southeast.
Like humans, birds can make awful real estate choices. If this has happened, a licensed professional with proper federal permits might be able to relocate the birds. Landscapers, pest companies, your neighbor, and you should never attempt a nest relocation. Improper relocation is most likely going to kill the young birds. Birds recognize their young by EXACT location, not just their calls. Contact us for advice.
A nest box on the house is excellent for smaller cavity nesters tapping on the home – nuthatches and chickadees. You can often simply place a box right over the hole they are making. Giving them a box can prevent the birds from not being able to find a nest cavity when the female is close to laying her eggs. Simply fill the created hole with a sealant and place the nest box over it. Put two inches of the aspen bark in the box. Ensure the box also has grooves all the way across the front wall, not just under the entrance hole, so babies can get alongside and push dominant, bigger babies away from the hole. Grooves should be 1/8″ inch deep by every 1/8″. Placement and location are same as Flickers. Never put perches on bird boxes unless you want to feed predators.
Should I use a nest box?
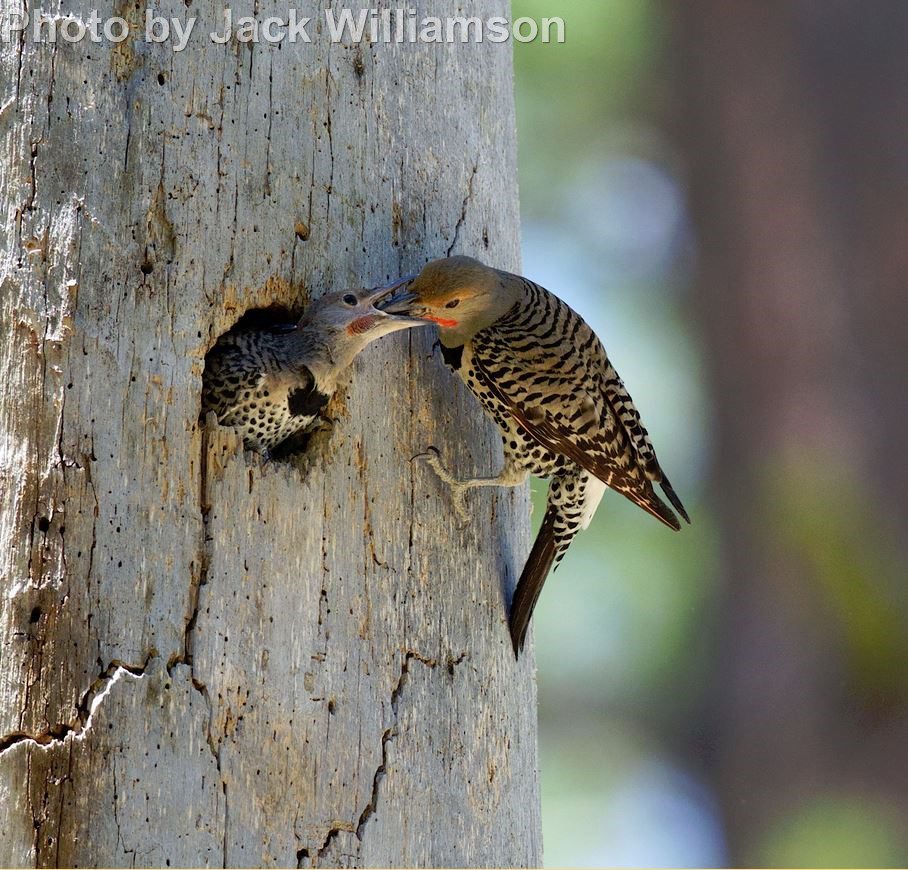
Flickers feed insects to their babies and young, and their babies need incredibly high protein content to be nutritionally sound enough to grow stout, fully functioning bodies that will allow them to survive. Feeder foods ARE NOT APPROPRIATE for babies! Do not be misled by marketing language that calls certain feeder foods good for nesting birds or babies. It is not! Babies need wild insects (mealworms are not enough and there are issues with them). The average nesting territory for flickers is about 330′ in circumference. They are large enough birds to fly some distance to find food for their young. Their nesting territory will vary based on how rich the habitat happens to be and the competition for their food sources (lots of ants). If there are flicker boxes on many homes in an urban neighborhood and the habitat is only marginally productive in insects, then those babies are at risk. When choosing to use bird boxes, please consider the amount of territory the birds will need, the quality of the habitat, and what competition the birds might face.


